September is National Sewing Month and to celebrate, we’re bringing you fun and frugal ways to spruce up your home with DIY sewing projects. Walmart has all the products you’ll need to get started, plus easy step-by-step instructions and how-to videos to help you! So even if you’re a beginner, you can tackle these projects effortlessly, adding a personal touch to your home decor for way less.

Purple Ikat Ogee Fabric | Solid Purple Fabric | Gray Aztec Fabric | Sewing Machine | Ironing Board | Iron | Thread | Fabric Scissors
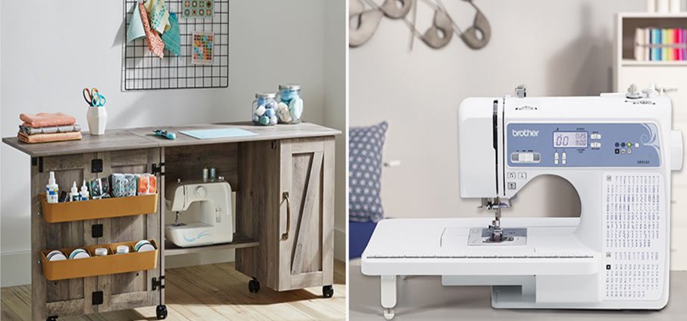
These are just a few essentials that you’ll need for pretty much any sewing project, so we recommend having these on hand. Various coordinating fabrics, a sewing machine, an iron and ironing board, multiple colors of thread, and fabric shears will be some of your go-to tools. New to the craft? Check out this sewing machine guide to find out which one is right for you.
How to Sew Curtains

A nice pair of curtains can instantly dress up any room. Making your own is way cheaper than buying them from the store, plus you can customize your curtains to match any room perfectly.
What you’ll need:
Instructions:
- Step 1: Measure for your curtain panels. For floor length curtains, measure from the floor to the top of the installed curtain rod. For this project, you’ll want to add 7 inches to that measurement. Measure the width of your curtains and double that number. Before you mark, cut off selvage edges of the fabric.
- Step 2: Lay out the fabric and mark the length and width measurements that you calculated in step one with a line across the fabric. Repeat this step to create two panels.
- Step 3: Lay out the fabric and mark the length measurement that you calculated in step one with a line across the fabric.
- Step 4: Mark and cut 16 pieces for the tabs (where your curtains will hang from the rod). These pieces should be five inches x five inches.
- Step 5: Mark and cut two strips of fabric that are five inches wide. These will be used for top facings.
- Step 6: Fold two inches on the long sides of each of your curtain panels and press. Unfold, then refold to the pressed line and stitch. Repeat on all four long sides of the panels as well as the short edges of the facing pieces.
- Step 7: Press ½ inch on the long edge of each facing strip.
- Step 8: Fold the tab pieces in half with their right sides together and pine close to the raw edge. Stitch ½-inch seams along the raw edges of each tab. Turn the right sides out and press with the seam centered.
- Step 9: With the right side of the panel up, pin the eight tabs to the top edge of the curtain. Make sure they’re evenly spaced with the seam side of the tab up and the raw edges aligned with each other.
- Step 10: Place the facing piece across the top over the tabs with the right sides together and the raw edges even. Pin in place.
- Step 11: Stitch across the panel at ½ inch through all thicknesses. Turn facing and tabs to the back of the panel and press. Tuck each tab under the facing and pin. Stitch across the panel to secure.
- Step 12: Lay panels out on the surface and remeasure to finish length determined. Mark with a pin on the outer edge of each side panel. Fold to the pins and press in final hem length. Unfold and take remain fabric to meet the pressed fold. Press again and pin. Stitch close to the folded edge to finish.
- Step 13: Hang curtains on the rod, threading the pole through the tabs on the back of each panel.
Watch the “how-to” video here.
How to Sew a Floor Pouf

Floor poufs are an adorable accent, but they can get pretty pricey. This make-your-own version is simple and inexpensive enough that you’ll want one in every room.
What you’ll need:
- Fabric (two yards, ½-yard contrast flange)
- Thread
- Sewing machine
- Ruler
- Pins
- Hand sewing needle
- Scissors
- Iron
- Ironing board
- Poly batting (or other stuffing materials)
Instructions:
- Step 1: Mark and cut four 6–18 inch squares from the main fabric.
- Step 2: Mark and cut strips of fabric 4–2 inches wide (12–36 inches long, depending on what you chose in step 1 for the flange).
- Step 3: Sew the squares together with a two inch seam, stitching on the bias to join.
- Step 4: Trim excess and press open bias seams. Press strip in half carefully matching the raw edges.
- Step 5: Pin flange to outer edges of two squares (top and bottom) with the raw edges matching on the perimeter. Fold three small pleats to pivot around the corners. Start to stitch the perimeter with ½-inch seam. When you get to the end of the flange, overlap to join the start and finish. Repeat on the bottom square.
- Step 6: Stitch the remaining four square right sides together with a ½-inch seam to create the body of the pouf.
- Step 7: Pin top two sides, right sides together, matching four side seams to four corners. Stitch with ½-inch seam, pivoting at each corner. Repeat the process for the bottom leaving an eight-inch opening to turn. Stitch, turn right side out.
- Step 8: Press the flange and side seams.
- Step 9: Fill tightly with poly batting or old recycled linens. Hand stitch the opening closed with a needle and thread.
Watch the “how-to” video here.
How to Sew a Throw Pillow

Decorative throw pillows can really complete the look of a room, but these too can be costly. A DIY cover is a great way to mix and match colors, patterns, and fabrics without breaking the bank!
What you’ll need:
- Fabric
- Thread
- Sewing machine
- Fabric pencil
- Pins
- Fabric scissors
- Pillow insert
- Craft paper for the pattern
- Iron
- Ironing board
Instructions:
- Step 1: Make the pattern for the pillow from craft paper. Make the paper pattern the size of your pillow insert (we chose an 18-inch square).
- Step 2: Trace the pattern onto the wrong side of the fabric. Cut the square. Trace two rectangles for the back (we did an 18 x 12 inch rectangle). Cut out the rectangle.
- Step 3: Press a narrow hem in one long edge of each rectangle and stitch.
- Step 4: Lay the fabric square on the table with the right sides up. Lay two fabric rectangles on top with the right sides down. Match edges with hemmed edges overlapping in the center. Pin the pieces together.
- Step 5: Stitch around the perimeter of the pillow with a ½-inch seam. Trim the corners and turn right side out. Press. Insert the pillow form.
Watch the “how-to” video here.
Thanks for reading! Which of these DIY sewing projects are you ready to try??


leave a comment