
April has been a whirlwind of fun, flavor, and fabulous finds! From festive Easter moments and colorful egg decorating with the kids, to spontaneous bake-offs that turned into sweet memories, this month has been packed with joy. I’ve also been exploring some new wellness routines—including a supplement that’s been a game-changer for my mood—and whipping […]
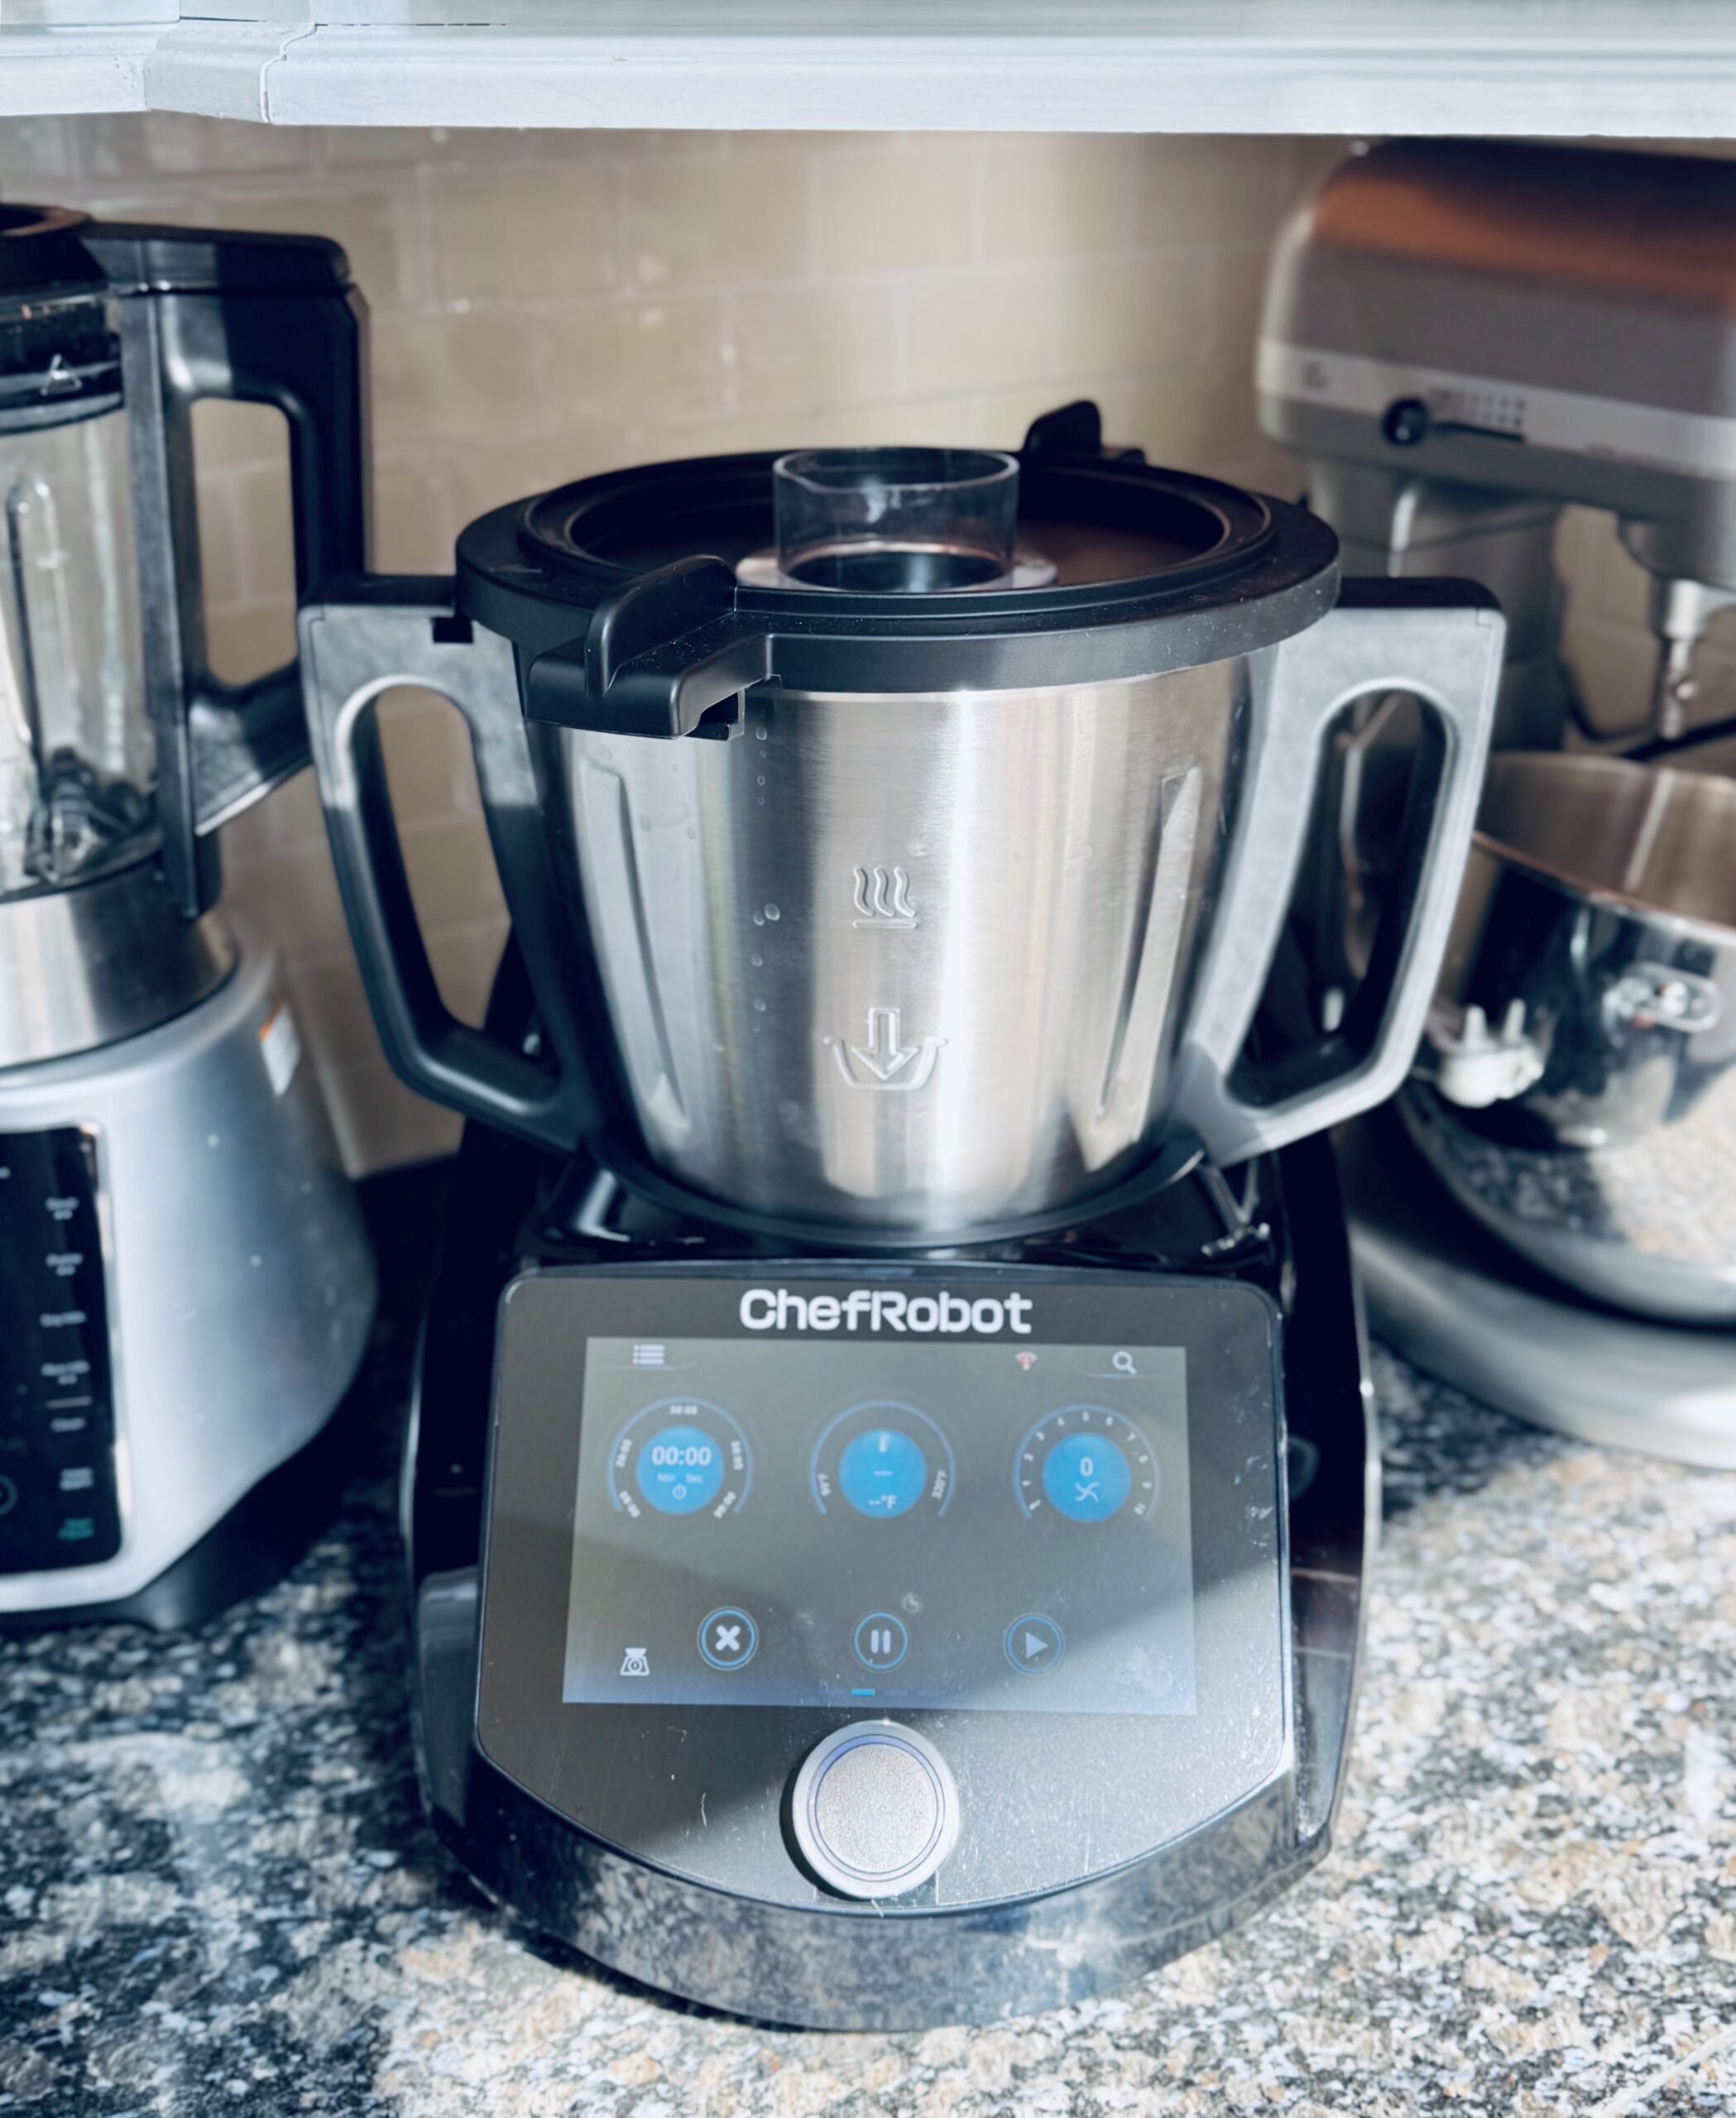
Imagine having a personal chef in your kitchen—one that chops, steams, blends, kneads, weighs, and even cleans up after itself. The Smart All-in-One Kitchen Food Processor is the ultimate game-changer for home cooks, combining over 15 cooking functions into a single device. Whether you’re whipping up a quick smoothie, slow-cooking a hearty stew, or kneading […]

Get Ready for the Ultimate Super Bowl Experience!The Super Bowl isn’t just about football — it’s about the energy, the excitement, and of course, the unforgettable parties! Whether you’re cheering for your favorite team, watching for the halftime show, or just in it for the snacks, having the right essentials will take your game-day experience […]

Finding the perfect gift can be tough, but we’ve made it easier with handpicked selections from Amazon! Whether you’re shopping for kids, teachers, or that special someone, our gift guides are packed with thoughtful options that are sure to impress. Frugal and Thriving may earn a small commission via affiliate links in this post. See […]


Love is in the air! Valentine’s Day is just about a month away, and if you’re someone who loves all things love, then this is the post for you! Deck the halls with touches of romantic glamour and get ready to celebrate Love Day in ultimate adoration. See Valentine’s Day decor from Target below. Whether […]
frugal and thriving LLC